Ask most cyclists their pet hate, and chances are that punctures will feature right up there with headwinds and chaffing in delicate areas. Unfortunately there's no magic chamois for a flat tyre - I did ask at EuroBike - so it's important to know how to deal with punctures when they crop up.
Whether you're new to cycling or an experienced rider who's usually left this sort of thing to your local bike shop, follow our step-by-step guide to help get you back on the road again.
1. Pack a spare
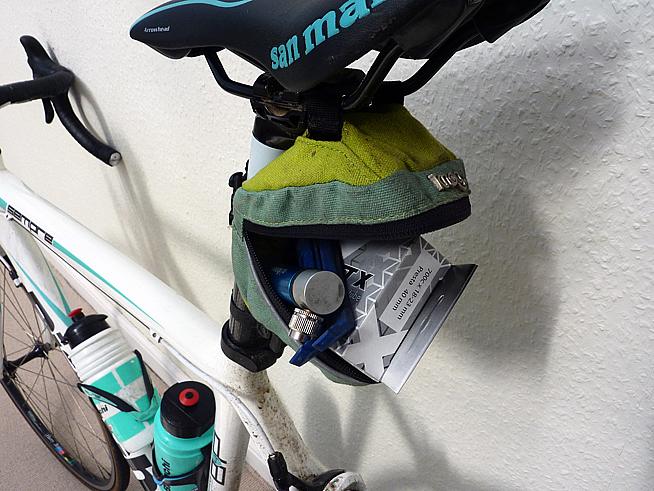
The first rule of Flat Club is one you may remember from the boy scouts, or 21st Century equivalent: be prepared. There is no excuse for going out on a ride, whether it's a weekend club run or a sportive, without carrying the three essentials:
1. Pump
2. Spare inner tube (ideally two)
3. Tyre levers.
2. Getting your hands dirty
We've all been there: you're riding along happily, when suddenly you feel an ominous rumbling beneath your back wheel and the sound of your wheel rim grinding on tarmac. 'Puncture!' you shout, as your friends disappear over the next hill. What now?
The first thing to do, once you've pulled over safely to the side of the road, is prepare to turn your bike upside down. We'll assume it's your back wheel that has the puncture. Rear flats are a bit trickier, as you have to faff about with a greasy chain in order to remove the wheel. To help with this, shift into your highest gear (the smallest cog on the back) before you turn the bike over:

If your pump, spare inner tube and tyre levers are in a saddle bag, remove those before flipping your bike. Remember to close the bag again before turning your bike over; otherwise, anything still inside - like a multitool for instance - could fall out and damage your frame. That's not going to improve your mood!
For the same reason, you might want to remove water bottles and your bike computer before turning the bike over.
You'll also need to flip open the brake release lever, usually located on the brake itself. In this picture it's the little black bit shaped like an apostrophe:
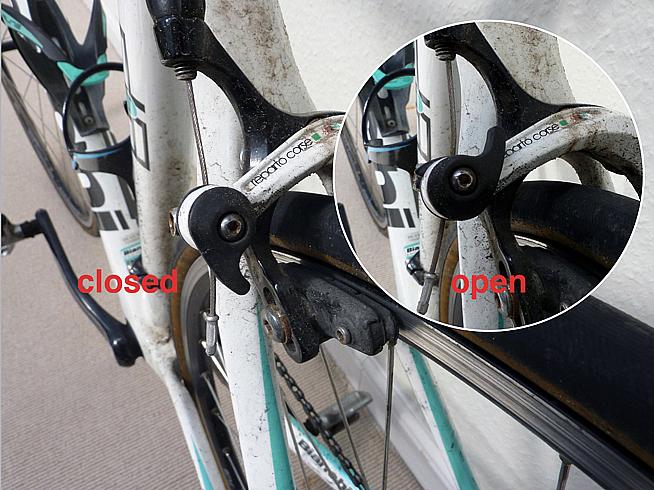
Flip the lever up as shown in the photo to release the tension in the brake cable - this should give you just enough space to remove the wheel between the brake pads.
Now turn your bike upside down:

3. Let's get this wheel off
Once the bike is resting securely in the 'head over heels' position, it's time to remove the offending wheel.
First, loosen the wheel by opening the quick release lever (shown here in its closed position):
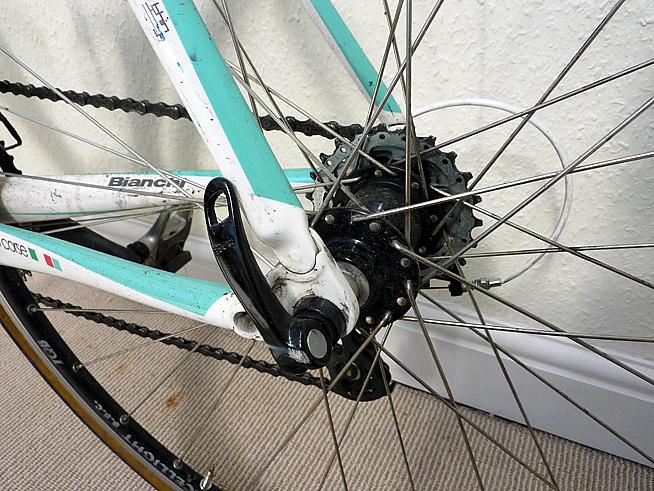
Depending on the width of your tyres, you may need to deflate the inner tube fully before you can remove the wheel. First locate the valve. If you're on a road bike like this, it's probably what's called a Presta valve (the other kind is called a Schrader).
To deflate, unscrew the knurled bit at the end furthest from the rim until you feel it loosen (note: don't unscrew it too much, it's not meant to come off). When it's loose enough, you'll be able to deflate the tube by pressing in the end of the valve:

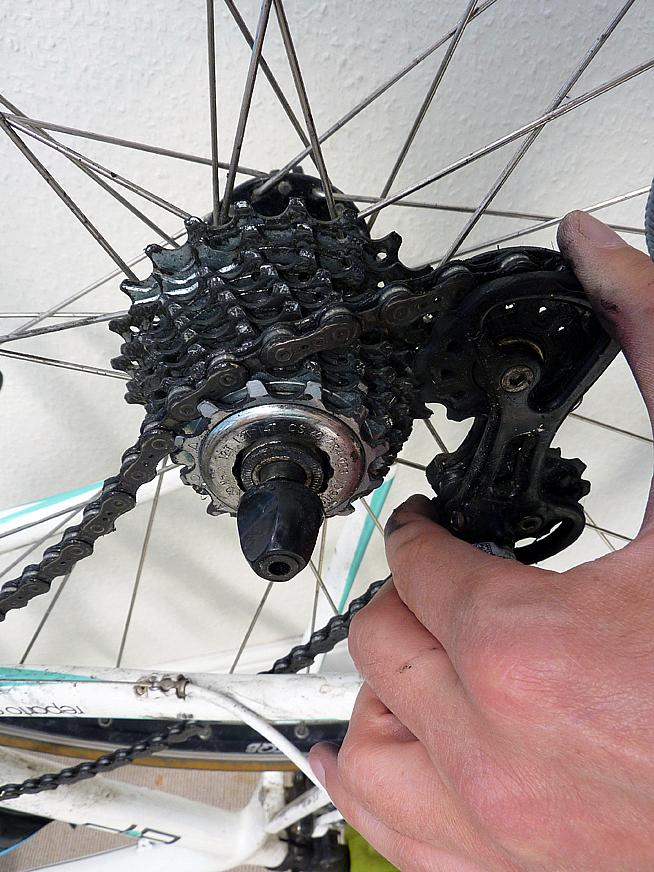
With the tyre deflated, it's now time to remove the wheel. This bit is tricky to describe, but essentially you want to carefully pull the rear derailleur backwards, giving the chain some slack so that it can be lifted over the cassette on the left hand side. Then, with your other hand, you can push the wheel forwards and up until it is free of the dropouts, and comes away from the bike.
4. Free your inner tube
If all has gone to plan, you are now holding a wheel with a deflated tyre. The next step is to get that punctured inner tube out of there.
Take a tyre lever and, starting just to the right of where the valve protrudes from the rim, insert the lever between the tyre and rim. You don't need to insert it too far. We want to remove the tyre from the rim all the way around one side of the wheel. The trick is to lever the bead of the tyre, but not the inner tube itself.
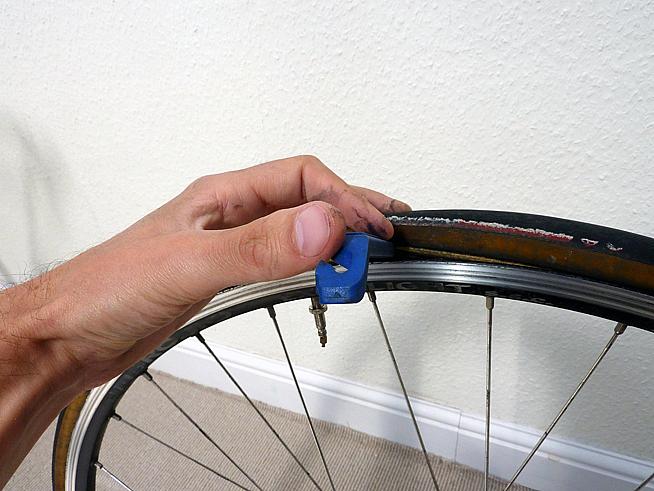
Next, push the lever down and hook the end of it over the nearest spoke (keeping the lever as parallel to the spoke as possible).

Now take your second tyre lever, and insert it a few cm to the right of the first one. Once the lever is under the bead, work it up and down while pushing forwards around the rim, gradually lifting the tyre off the rim. This will take a bit of elbow grease at the beginning, but once you're about a third of the way around the wheel it gets a lot easier.

Once you've loosened the tyre all the way around the circumference of the wheel, it's time to take out the punctured tube. Start at the valve again. Holding the tyre back with one hand, push the valve up through the hole in the rim and pull it out the other side:
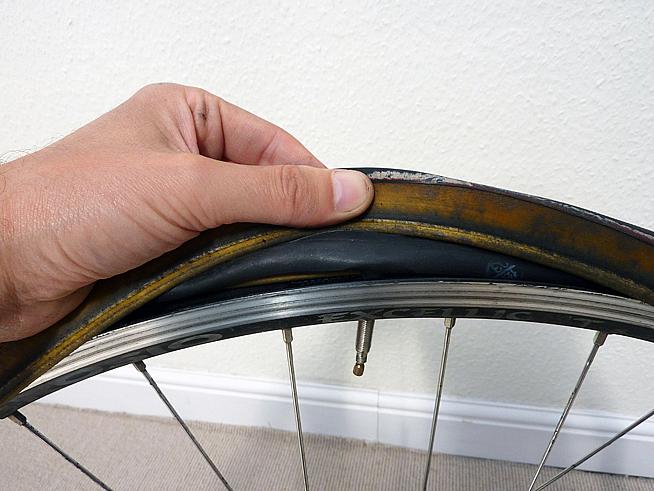
It should now be easy to pull out the rest of the inner tube.

5. Search for alien bodies
You're now almost ready to insert a new tube. But first, check the inside of the tyre for debris - whatever caused the puncture in the first place could still be lodged in the tyre. There's nothing more frustrating than fitting a new inner tube and setting off, only to get another puncture a few minutes down the road.
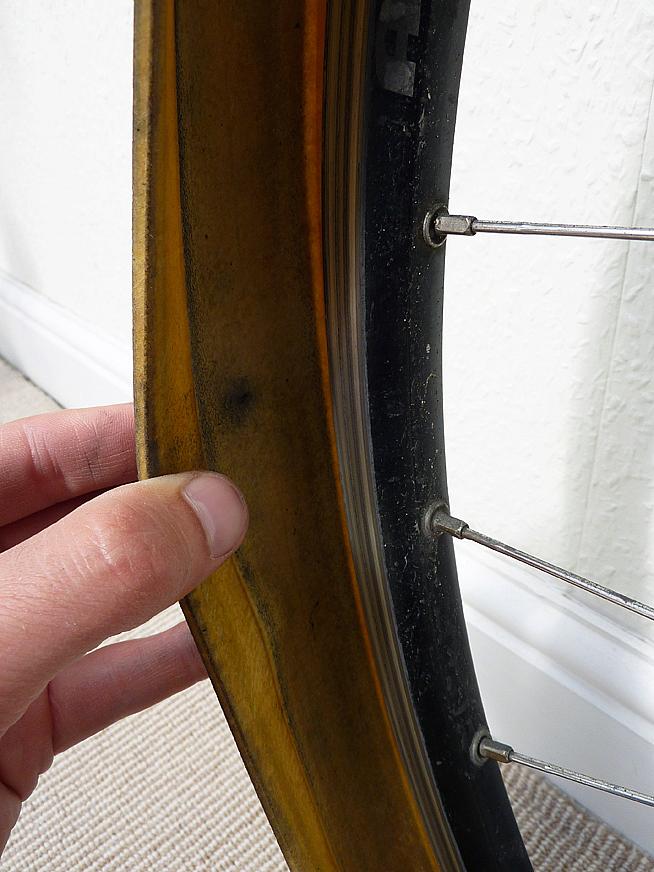
Once you're satisfied that the inside of the tyre is clear, check the outside. Work your way around the whole tyre. Often you'll find a small hole like this, sometimes with a piece of glass or flint still embedded in it:

6. In with the new
When you've given your tyre the all-clear, it's time to fit in a new tube. This part is simple. Pump a bit of air in the new tube first - just enough to swell it into shape a bit. Insert the valve through the hole in the rim first, and then work your way around the circumference of the wheel, using your fingers to tuck the tube beneath the tyre.
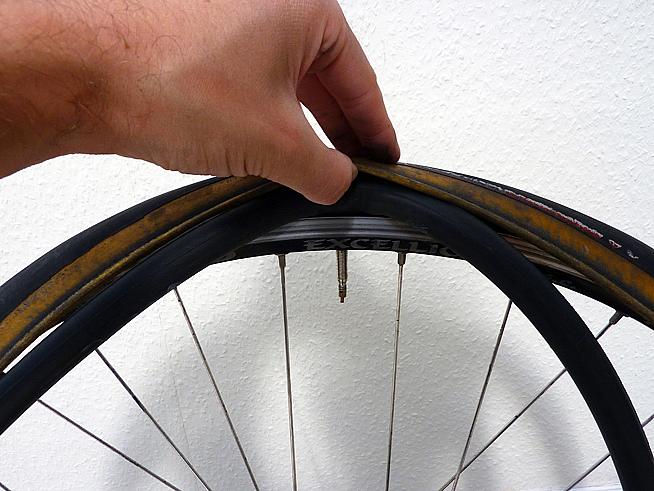
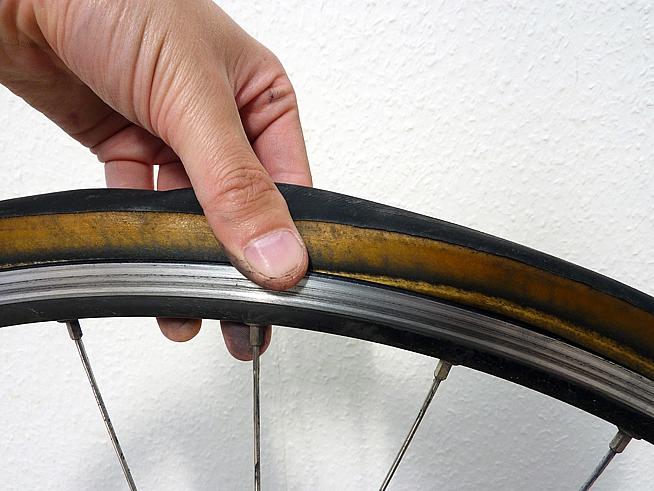
Next, we have to push the tyre back on to the rim - taking care not to pinch the new inner tube between tyre and rim. This can be a bit of a struggle, especially the last bit. I find that placing both hands flat on the top of the tyre, hooking my fingers over the rim and then using both thumbs to push the bead up over the rim does the trick.
7. Pump'n'go
At this point your cycle buddies are probably complaining about their legs starting to seize up, but pay no attention - you're nearly there! WIth the new tube fitted and tyre safely on, all that remains is to reinflate the wheel and fit it back on.
A track pump with a pressure gauge like this is best for home repairs, but if you're on the road a hand pump or CO2 cannister will do the job.
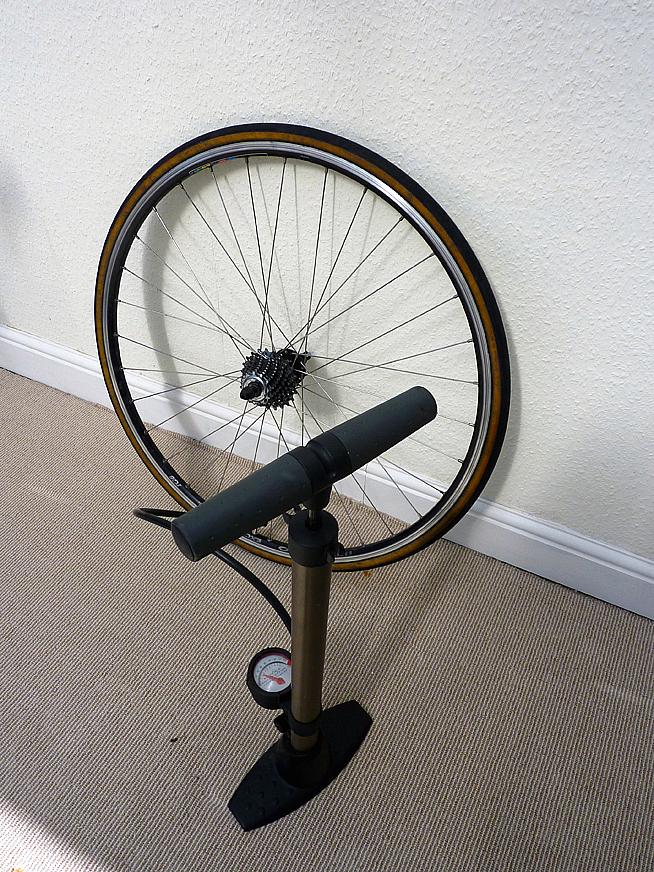
Refitting a rear wheel gets easier with practice. The key thing is to make sure you insert the cassette inside the loop of the chain - this will usually mean pulling back the rear derailleur, as before, to create a bit of slack, and then slotting the axle into the dropouts before letting go of the chain.

Last but not least, remember to secure the wheel in place with the quick release lever, and to flip down the brake release lever. In all the excitement it's easy to forget this, but your brakes won't work properly without it.
While you're in a vigilant frame of mind, you might as well check the ground for your pump, spares, water bottles etc that may be lying around.
And now, you're finally good to go. Just think, as you wheel off again - by learning to carry out this simple repair, you've saved yourself more time than shaved legs and an aero skinsuit combined!
0 Comments


